


If you are selling on Amazon, you already know the drill. You upload your listing, price it right, write bullet points that (hopefully) convert, and then you wait. But here's something a lot of sellers get wrong: none of that matters much if your Amazon product photography doesn't stop the scroll.
Shoppers aren't reading your listing first. They are looking at your thumbnail, and in that split second, your photos are doing all the talking. Let’s dig deeper and find out what Amazon actually requires from your images, which photo styles pull the most weight for conversions, and how you can get studio-quality shots without renting a studio or hiring a full production crew.
Why Product Photos Make or Break Your Amazon Listing
Think about the last time you bought something online. You couldn't pick it up, flip it over, or feel the fabric. All you had were the images. That's the entire shopping experience for every Amazon customer, every single time.
A few things follow from that:
- Your main image decides whether someone clicks. If it's dark, cluttered, or just blends in next to your competitors, you have lost the sale before the customer even opens your listing.
- Your supporting images decide whether they buy. Once someone lands on your page, they'll flip through every photo before reading a single bullet point. If the images don't answer basic questions like size, material, or how it's used, they'll bounce to someone else.
- Weak photos quietly kill trust. A blurry or amateur-looking image makes shoppers assume the product itself is amateur, even when it's genuinely well made.
This is exactly why so many sellers now search for an amazon product photography service instead of trying to wing it with a phone camera on the kitchen counter. It's not vanity. It's basic conversion rate math.
Amazon's Photo Requirements at a Glance
Before you get creative with your shots, you need to hit Amazon's baseline rules. Miss these and your amazon listing images can get suppressed, or your images could get swapped out entirely.
Image Slot | Purpose | Technical / Amazon Requirement |
Hero (Main) | Search click-through | Pure white background (RGB 255,255,255), product fills 85%+ of frame, no text, logos, or props |
Lifestyle | Emotional connection | Realistic setting that shows the product's context or target user |
Infographic | Skim-friendly features | Short text callouts, minimum 1,600px (2,000 × 2,000 px square ideal) for sharp mobile zoom |
Dimension / Scale | Fewer returns | Clear size comparisons with exact measurement overlays |
Outside the hero image, you have more creative freedom. You can add colored backgrounds, text, and graphics to your remaining six or seven slots, plus a video if your category supports it. Most sellers only use two or three of these slots well and leave the rest half-finished, which is a wasted opportunity.
RELATED READING: How to Increase Amazon Sales: 15 Proven Strategies to Sell More Products on Amazon
7 Amazon Product Photography Styles That Drive Conversions
A single white-background shot won't carry a listing anymore, especially in a crowded category. Here's the mix that tends to perform best, and it's roughly the same shortlist experienced sellers and photography services work through for every new client.
1. The hero shot
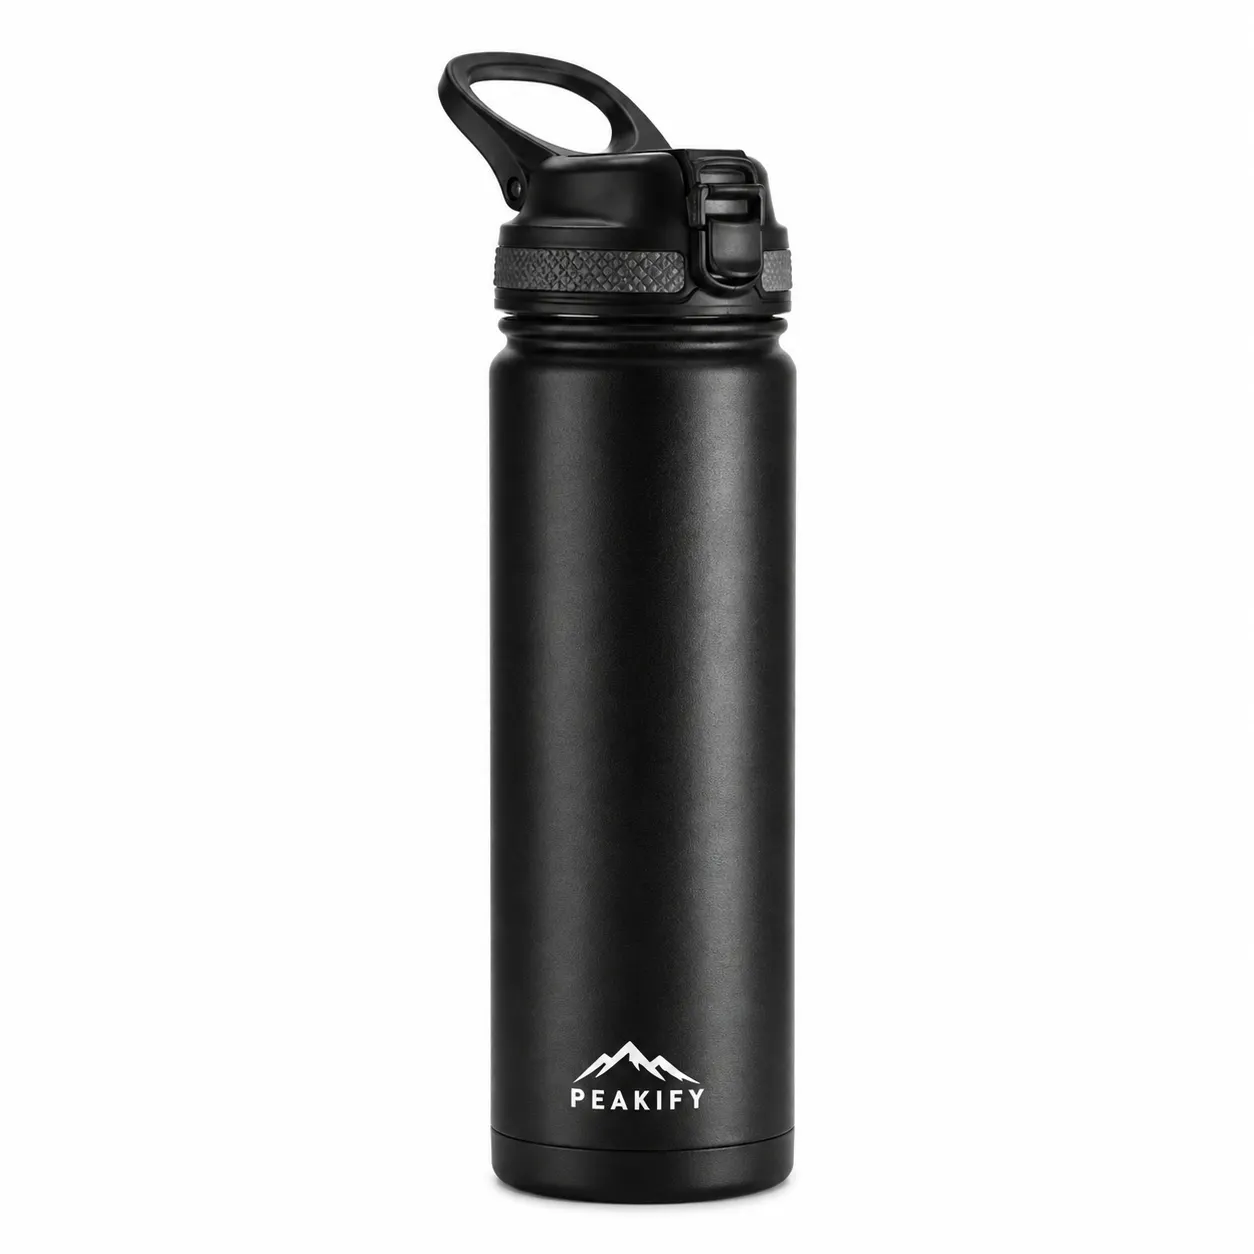
Your hero shot is the most important image in your Amazon listing because it's the first thing shoppers see in search results. It should feature your product on a pure white background, centred in the frame and occupying most of the available space. A clean, well-lit hero image instantly communicates professionalism and encourages shoppers to click on your listing instead of a competitor's.
2. Multiple angles
Customers can't pick up your product before buying it, so your images need to recreate that experience. Photograph your product from every important angle, including the front, back, sides, top, and bottom where relevant. Showing multiple perspectives gives shoppers a complete understanding of the product and reduces uncertainty before they purchase.
3. Lifestyle images
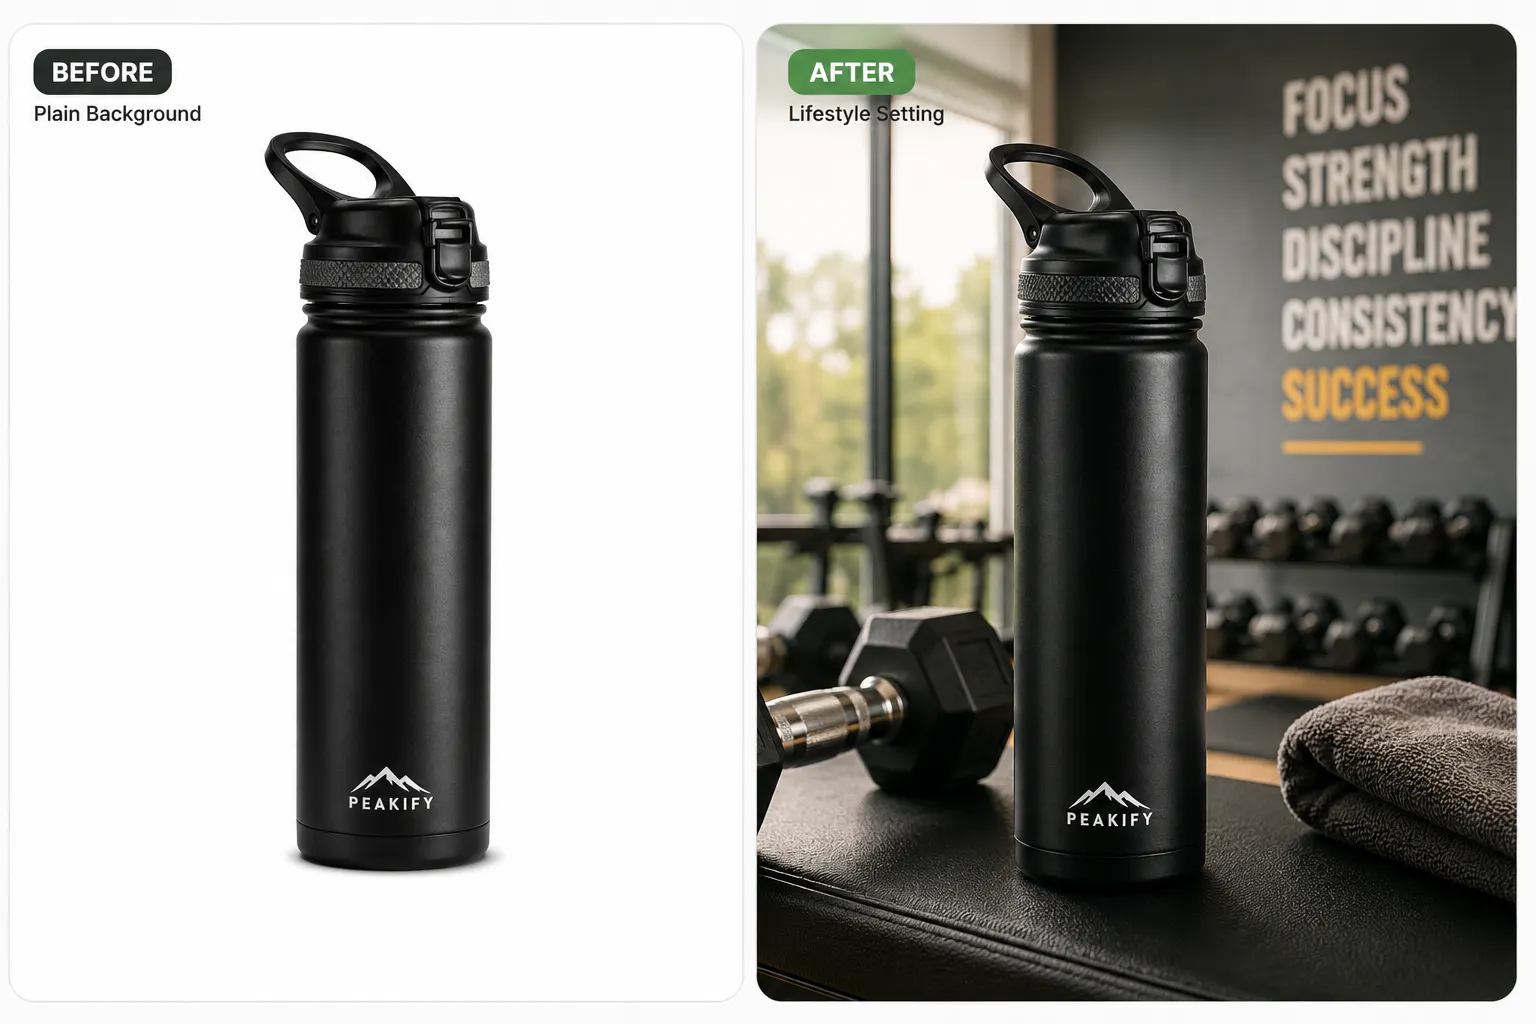
Lifestyle images help customers imagine your product in their own lives. Instead of displaying it on a plain background, place it in a realistic setting where it's being used naturally.
Whether it's a kitchen appliance on a countertop or a backpack on a hiking trail, these images create an emotional connection that often influences purchasing decisions. They also demonstrate the product's purpose more effectively than a standalone product photo.
4. Infographic images
Infographics combine product photography with concise text and visual callouts to highlight important information. They can showcase dimensions, materials, key features, or product benefits in a way that's easy to understand at a glance. Since many shoppers browse images before reading descriptions, well-designed infographic images help communicate your product's value quickly and clearly.
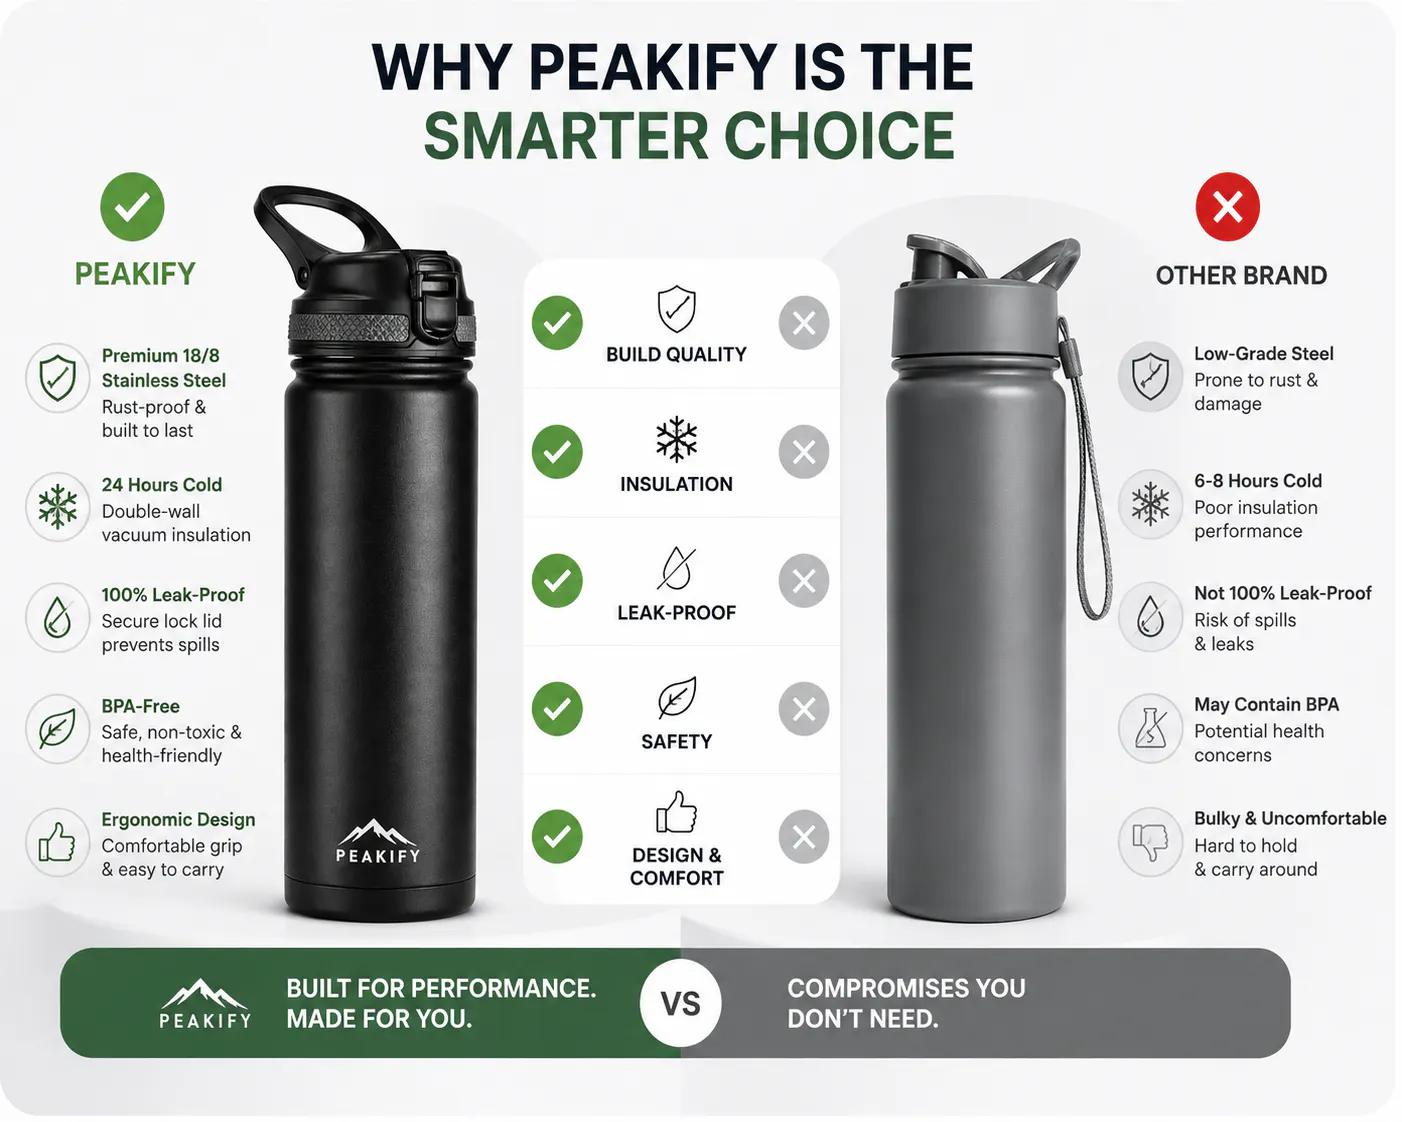
5. Comparison images
Comparison images allow you to highlight what makes your product stand out without directly mentioning competing brands. You can compare features, included accessories, materials, or performance against a generic alternative to demonstrate your product's advantages. When done thoughtfully, these visuals help customers understand why your product offers better value.
6. Size and scale images
Size is one of the biggest reasons customers return products. A dedicated size and scale image removes guesswork by showing measurements or placing the product next to familiar everyday objects. This is especially valuable for furniture, jewellery, electronics, home décor, and storage products, where accurate size expectations can significantly reduce returns.
7. Instructional or "What's in the box" images
If your product requires assembly, installation, or includes multiple accessories, dedicate one image to explaining what's included. Showing every component in the package and providing a simple visual overview of setup helps answer common customer questions before they arise.
It also sets clear expectations, reducing confusion and minimising the likelihood of negative reviews caused by missing or misunderstood components.
Sellers researching this often fall down a rabbit hole of related searches: amazon product photography jobs, amazon photoshoot service, professional product photography. Realistically, the right approach depends less on where you search and more on how fast you need to move and how many SKUs you are dealing with.
RELATED READING: Selling on Poshmark: Complete Guide for Resellers 2026
The Traditional Route: Studios, Photographers, and Waiting
Historically, getting decent product photography meant picking one of three paths:
- Hiring a local photographer and either shipping your product to them or driving over for a session
- Searching for an amazon product photography service india or similar, mailing the product, and waiting days or weeks for a deliverable
- Booking a freelancer off a marketplace and hoping the final images actually match what you pictured
None of these are bad choices exactly. A skilled photographer with proper lighting still nails certain shots, particularly for high-end or luxury items where texture and craftsmanship genuinely need to come through the lens.
But the process is slow and it isn't cheap. A single shoot with lighting, editing, and a photographer's time can run into hundreds of dollars per batch, not per SKU. If you are managing a catalog of dozens or hundreds of products, this model stops making sense pretty quickly.
A Faster Way to Get Studio-Quality Shots
This is where things have genuinely shifted for online sellers over the past couple of years. You no longer need a lightbox, a rented studio, or a photographer on retainer to get images that look like they came from one.
Tools like Blend let you take a single photo of your product, even one shot on your phone against a messy background, and turn it into a clean, Amazon-compliant white-background image in seconds. Need a lifestyle version too? Blend can place your product into a realistic scene, a kitchen counter, a bathroom vanity, or someone actually holding it, without booking a model or scouting a location.
Here's what makes this approach worth trying, especially if you have ever been up late Googling amazon product image size requirements trying to fix a suppressed listing:
- Background removal and studio shots in seconds. Upload a photo and Blend produces the pure white background Amazon requires, no lightbox needed.
- AI-generated lifestyle shots. Skip the model booking and location scout. Blend places your product into a realistic, on-brand scene that actually looks like it belongs there.
- Ghost mannequin and AI model shots for apparel. For clothing sellers, this can replace an entire studio session on its own.
- Batch processing for larger catalogs. Process many images at once instead of editing each one manually.
- Infographic and poster tools built in, so you are not bouncing between five different apps just to add a size chart or a feature callout.
If you are weighing a quote from a product photoshoot studio against something quicker, it's worth trying Blend before committing to a shoot date and an invoice. A lot of Amazon and Etsy sellers already lean on it because it was built with marketplace requirements in mind, so the output comes out already sized and formatted the way Amazon expects, instead of needing fixes afterward.
RELATED READING: 15 Product Photography Tips to Make Your Products Look Professional and Sell Faster
Quick Checklist Before You Publish Your Listing
Run through this before your images go live:
- Does your main image have a pure white background with no text or graphics?
- Does the product fill roughly 85% of the frame?
- Are your images at least 1,600px on the longest side?
- Do you have at least one lifestyle shot showing real use?
- Have you added an infographic calling out key features or dimensions?
- Is there a size or scale reference somewhere in your image set?
- Have you compared your main image against your top three competitors to check if yours stands out?
If you can check off all seven, you are already ahead of a large share of sellers on the platform.
Conclusion
Your amazon product photography isn't a formality you check off before hitting publish. It's arguably the single biggest lever you have over your conversion rate. Get the technical requirements right, build a mix of hero shots, lifestyle images, and infographics, and don't be afraid to lean on tools that speed the process up without sacrificing quality.
If you want to test this on your own catalog before booking a photographer or a studio day, give Blend a try. You can start creating studio-ready shots for free and see the difference yourself.